
1. Click the 'Messaging’ dropdown on Event Settings Panel, then ‘Emails’
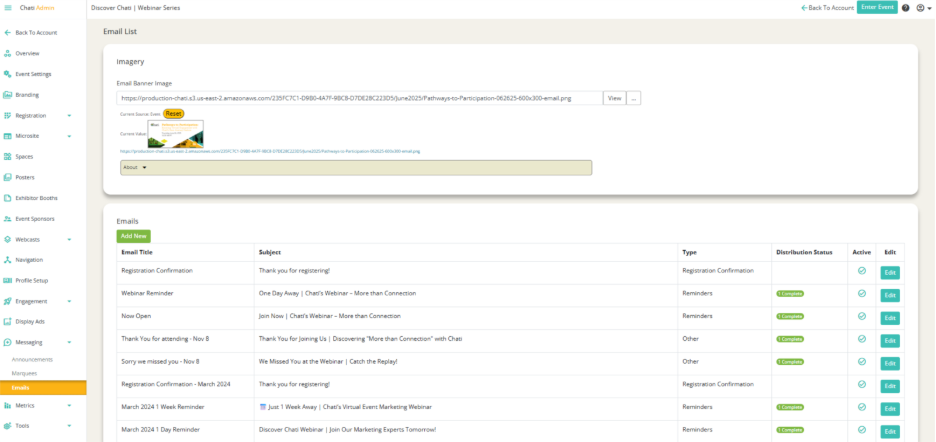
2. Click 'Add New’
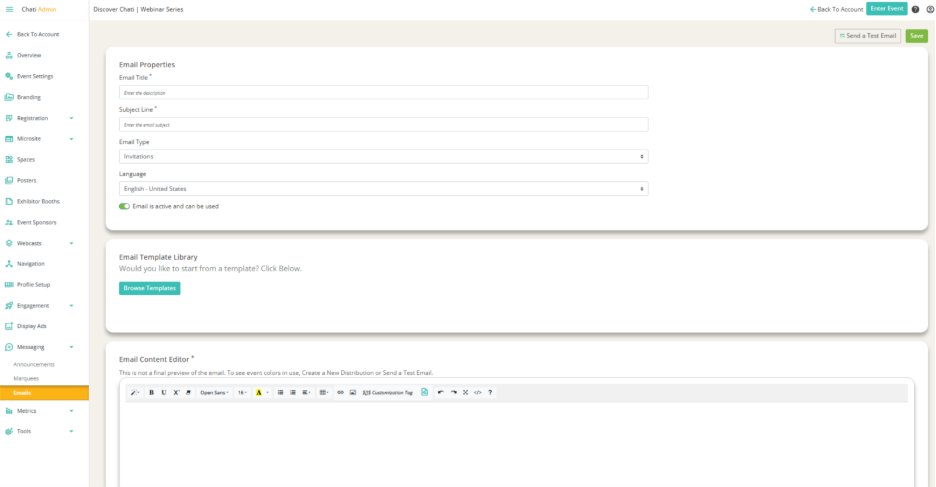
3. Fill out the Email Properties
- Email Title*: Required
- Subject Line*: Required
- Email Type: For internal reference (registration confirmation, etc.)
- Language: Select a language
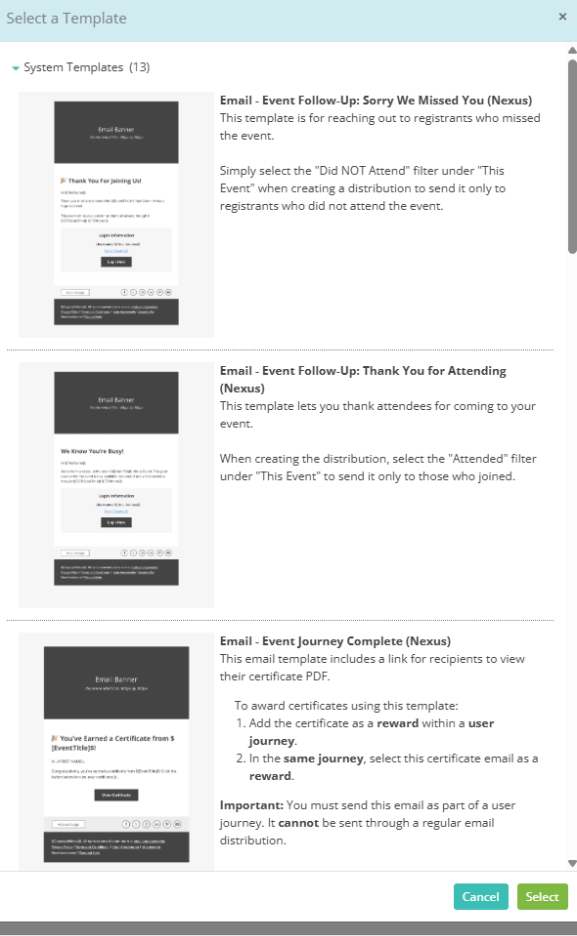
4. Visit the Email Template library if you wish to start from a Chati email template (Nexus is recommended)
5. Once a template has been selected, scroll down to the Email Content Editor*
- Certain elements will automatically pull from the event branding (colors, etc.). Many parts of the email are pre-populated with text/emojis, but can be edited (copy, customization tags, etc.)
6. Scroll down to Distributions [ET], then click ‘Create New Distribution’

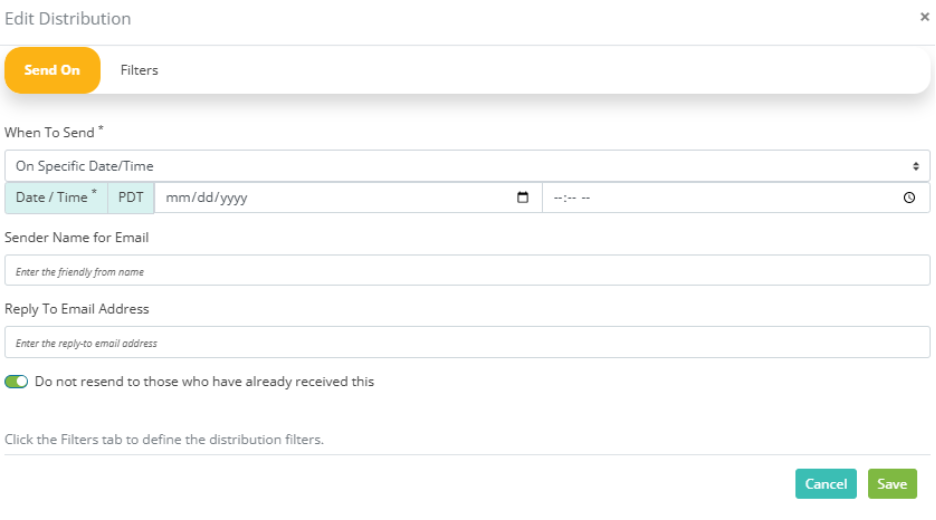
7. Fill out ‘When To Send*’ It is required (If event date changes, you won’t have to change all of the distributions because it’s set relative to the event date)
8. Click ‘Save’