
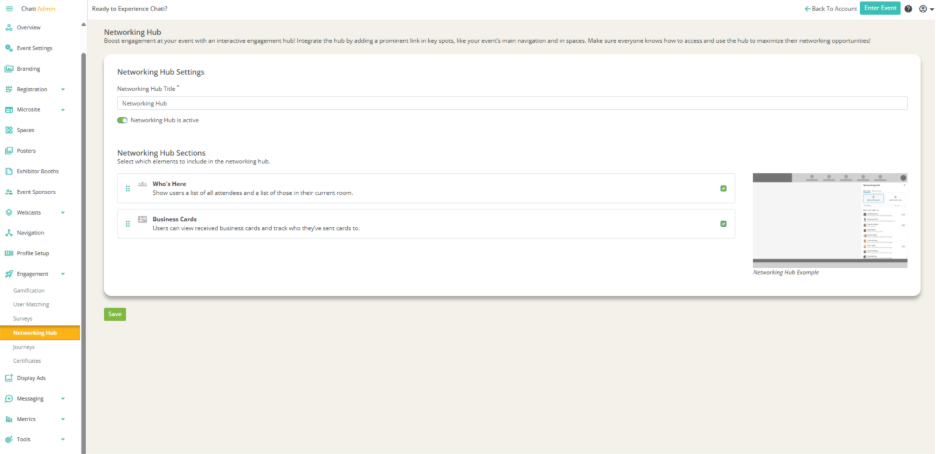
Networking Hubs in Chati show attendees who are in specific spaces with them, as well as who is in the event (as a whole). Some attendees will be marked as ‘Staff’ in the Networking Hub for attendees to see. Attendees are also able to send/receive business cards within the Networking Hub.
1. Click ‘Engagement’ on Event Settings Panel, then ‘Networking Hub’
Template Selection for Mobile Compatibility
2. Change the ‘Networking Hub Title*’ if you wish (not necessary to change)
3. Ensure that the ‘Networking Hub is active’ slider is green

4. Under ‘Networking Hub Sections,’ enable ‘Who’s Here’ and ‘Business Cards’ if you’d like attendees to have access to both engagement options
- You can move around the engagement option by dragging (will change their order in the live event)

5. Click ‘Save’
6. Click 'Navigation’ on Event Settings Panel
7. Scroll down to the ‘Icon Menu Items’ section
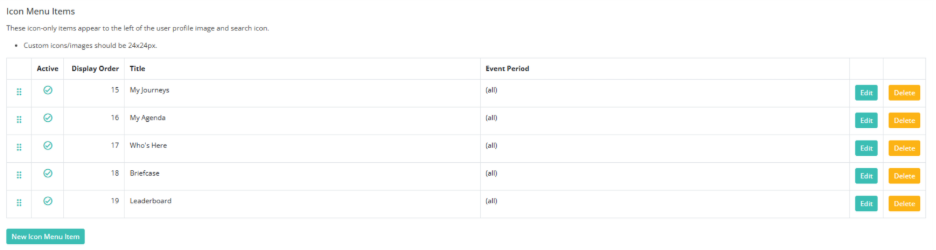
8. Click ‘New Icon Menu Item’
9. Add the following:
- Add ‘Networking Hub’ as the ‘Title*’
- Set ‘Networking Hub’ as the ‘Link Destination*’
- Select a ‘Menu Graphic’
- Select an icon
10. Click ‘Create’
11. Scroll down, click ‘Save’