
Host blocks of time for participants to connect with one another without having to manually seek out others and schedule meetings.
During these dedicated blocks of time, Chati will randomly pair participating attendees for short one on-one virtual meetings with the goal of introducing themselves, sharing professional backgrounds, and identifying potential opportunities for collaboration or networking
Setting it Up
1. Add the supplemental questions to Chati
If Speed Networking is planned to be used within a Chati event, it should be discussed while the registration page is being set up. This is because the user information displayed inside Speed Networking comes from the user profile and custom registration questions.
To ensure participants fill in that information, event hosts/organizers should include those fields/questions on the registration form. That way, participants can enter the event without having to update their information before joining Speed Networking.
Click here to be taken to ‘Adding Supplemental/Custom Registration Questions’
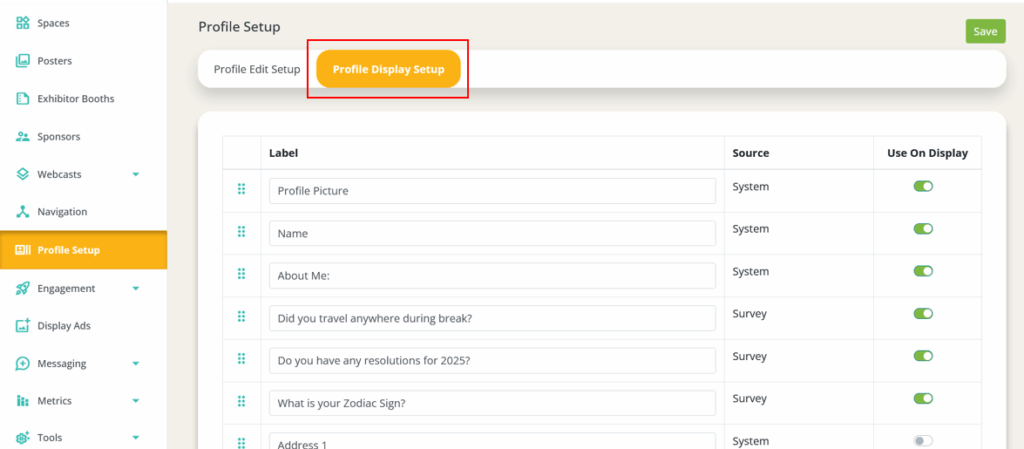
2. Setup Event Profile
Once the questions are created, they must then be activated inside the user profile.
Click here to be taken to ‘Setting up Event Profile’
Speed Networking will automatically use the fields selected in the Profile Display Setup.
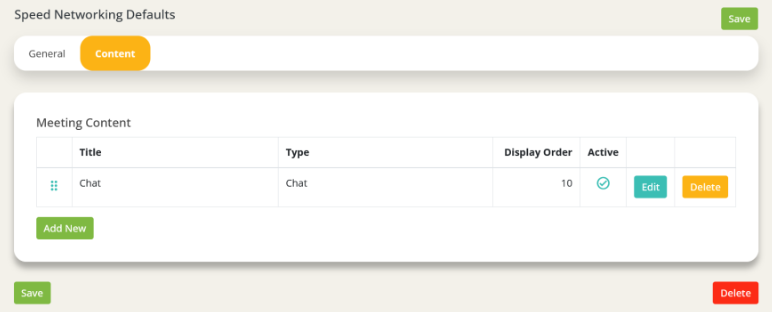
3. Configure the event-level defaults for the Speed Networking Feature
- Select ‘Tools’ on the navigation bar, and click ‘Speed Networking Defaults’
- Select the webcast/chat room template (this defines the overall layout of the conversations)
- System Template: Webcast (Speed Networking) - With Vertical Content Template
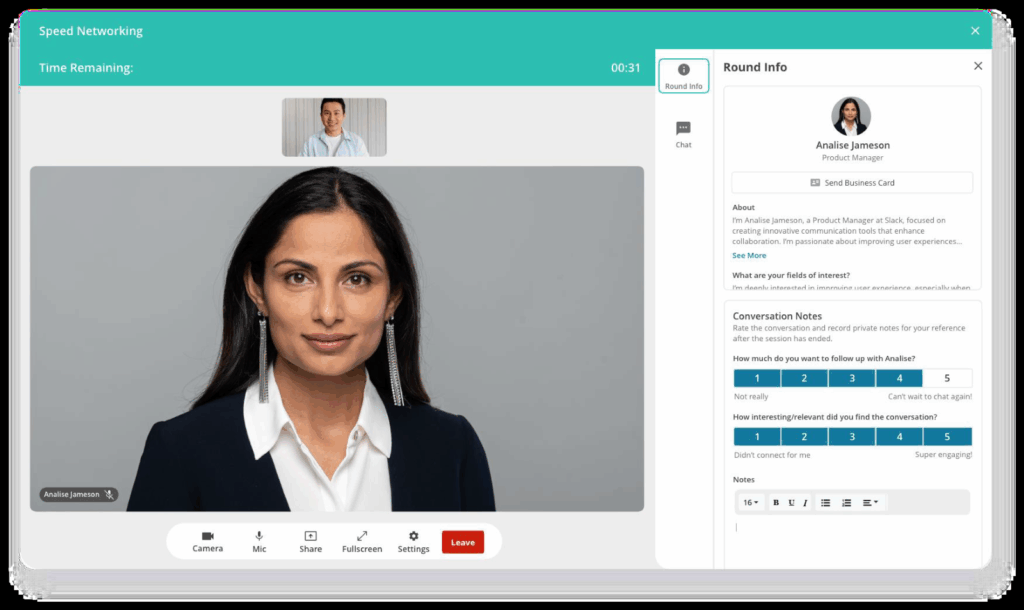
i. This will automatically include the “About” information and notes section as the first tab. The “About” information is the unique content section specifically made for speed networking where users can see the profile of their round partner, send them their business card, and add meeting notes.
ii. Additional content tabs, like text-based chat, can be added by using the content section.
- Webcast (3D) - With Vertical Content Template
i. Content tabs, like text-based chat & the About information, can be added by using the content section.
ii. The order of the content tabs can be customized by using the Display Order.
- Set the default minutes per chat
- This sets the maximum duration of the meetings/conversations for all Speed Networking blocks/sessions set up in the event.
- If a specific Speed Networking Session needs to have a different meeting duration, this can be overridden during the setting up of the individual session (see Step 4).
- Set the number of minutes to not allow previously matched users to rematch
- This sets how long the system will wait until it pairs participants together again.
- The default is 8 hours, and the minimum length is 10 minutes.
- Select the Meeting Participant Capabilities
- Select default
4. Create the Speed Networking Session/Block
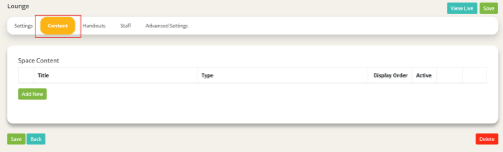
- In the event admin, find the Space/Booth where the Speed Networking session/block will be hosted.
- In the Space Content area, Add New. Please note: Each individual Speed Networking Block/Session should have its own listing in the Space Content. Fill out the following attributes:
- Content Title: The title of the overall Speed Networking block/session. This title cannot exceed 40 characters, including spaces.
- Display Order: This can be ignored for Speed Networking as speed networking session will always live inside their own modal and not within a list.
- Availability Dates: This determines when the Speed Networking block/session will be open for people to join and participate.
- Feature Type: Speed Networking Room
- Minutes Per Chat: The maximum number of minutes for each conversation/meeting within this Speed Networking block/session.
- Sponsor: When selected, the sponsor’s logo/name will display. Go to Sponsors to create a new sponsor to be associated with a Speed Networking block/session.
- Abstract: This optional introductory information can be provided by the customer. It is displayed on the Speed Networking Join Page.

- Based on the layout and design of the space, use the editor to ensure that the Speed Networking session will open in a Modal with the Maximum size.
- Feel free to link a hotspot, CTA, image, etc. To the booth feature
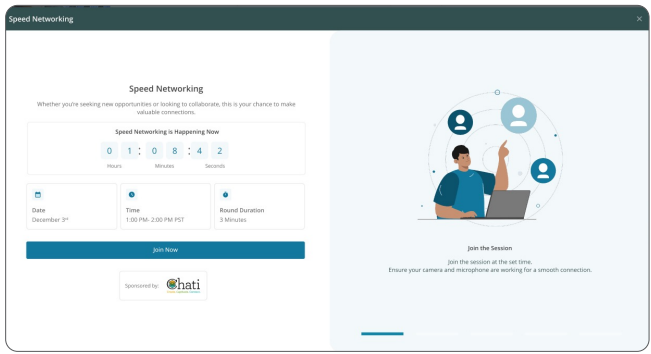
5. Check the configuration
Once the Speed Networking block/session has been created and added to the space, it is important to test it.
- Enter the event as a registered user. It can be your admin user or any other user that has early access to the event.
- Navigate to the space and click to open the Speed Networking.
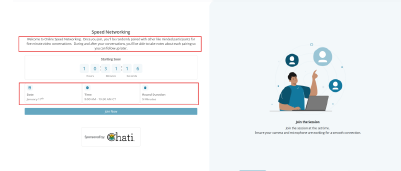
- You will not be able to join Speed Networking until it’s designated start time, but you should check the following details:
- The Abstract
- The Date
- The Start and End times
- The Round Duration
- The Sponsor, if applicable
6. Enable the corresponding reports
There are three reports that support the Speed Networking features.
- My Speed Networking Sessions: This report is intended for individual attendees to see their activity within the Speed Networking sessions they participated in.
- This report is a System report, meaning that it is automatically available and does NOT need to be created using the Report Builder. It will need to be added to the Data Portal.
i. If you want users to be able to access this report, don’t forget to share the data portal link with them via email, in the event, etc. After configuring the available reports.
ii. The report, when enabled, will allow participants to access the following information: the space the session was held in (like the networking lounge or lobby, the room name (the title you gave the speed networking session), the start time, the name of who you met with, their company and job title, their meeting duration, the follow up and interest scores the participant added, any notes that the participant added, and the timezone. The participant only sees data for sessions they attended and only notes they added.
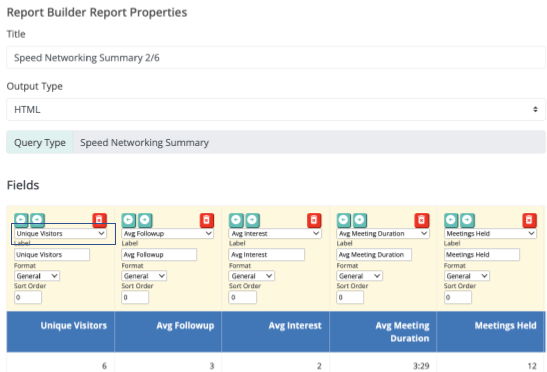
- Speed Networking Summary: This report is intended to show the overall participation of the Speed Networking Sessions within an event.
- Set up the report via the event report builder. When adding a field to the report, scroll to the bottom of the list to see a subtitle labeled “Speed Networking Session”. Unique field options for this report are avg. Followup, avg. Interest (these are the avg. Rating scores participants add to their conversations), avg meeting duration, number of meetings held, session topic (the title you gave the session), total meeting duration (time spent in rounds), total session duration, unique visitors.
- Speed Networking Detail: This report shows details on exactly who met with who, when, and for how long.
- When setting up the report, you can add many different fields including any added profile field, UDF, or reg question. Unique to this report are two subcategories of field options labeled Speed Networking Chat and Speed Networking Session.
i. Speed Networking Chat field options- Chat duration, chat start time, with user company name, with user email address, with user job title, with user name
ii. Speed Networking Session field options- Session start date, session end date, and session topic (the title you gave the session).
- After adding your desired report fields be sure to save your selections before clicking the run button.
