Each registration package in Chati can have its own customized confirmation email. This allows you to send targeted, package-specific information to attendees based on their registration type. Registration confirmation emails are automatically sent to users after they register.
Step-by-Step: Configuring Confirmation Emails
Step 1: Access Email Settings
- Go to Messaging--> Emails
- Click “Add New”
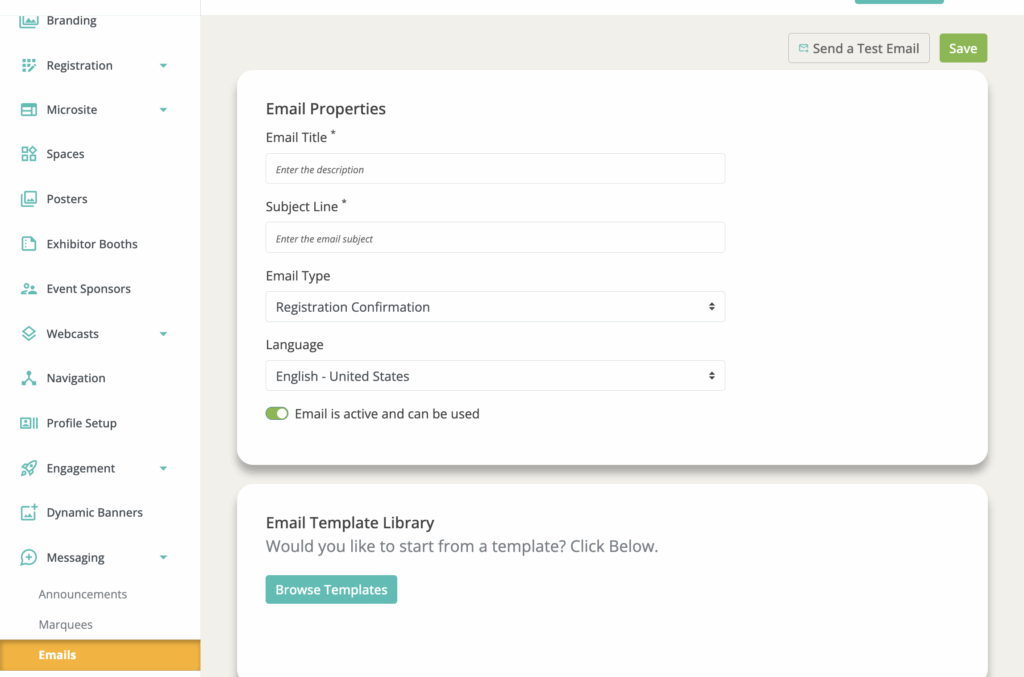
Step 2: Customize Email Content
- Give the email a title (for internal labeling)
- Subject Line: Create a clear, engaging subject line
- Example: "Welcome to [Event Name] - Your VIP Access Confirmed!"
- Example: "Registration Confirmed - [Event Name] General Admission"
- Select the email type “Registration Confirmation” (If you don’t, you won’t be able to select the email in the registration package)
- Select a Template, or Build Your Own
- There are different templates available for different registration processes:
- Standard: Email- Registration Confirmation (Nexus)
- Paid Registration: Email- Paid Registration Confirmation (Nexus)
- When using Chati for paid registration, this template gives attendees access to their registration payment information.
- Two-Factor Authorization: Email- Registration Confirmation- Two-Factor Authorization (Nexus)
- If you use two-factor authentication in your registration process, you will need to create two emails. One will use this template so users can confirm their registration, and the other will be the registration confirmation when users are officially registered.
- There are different templates available for different registration processes:
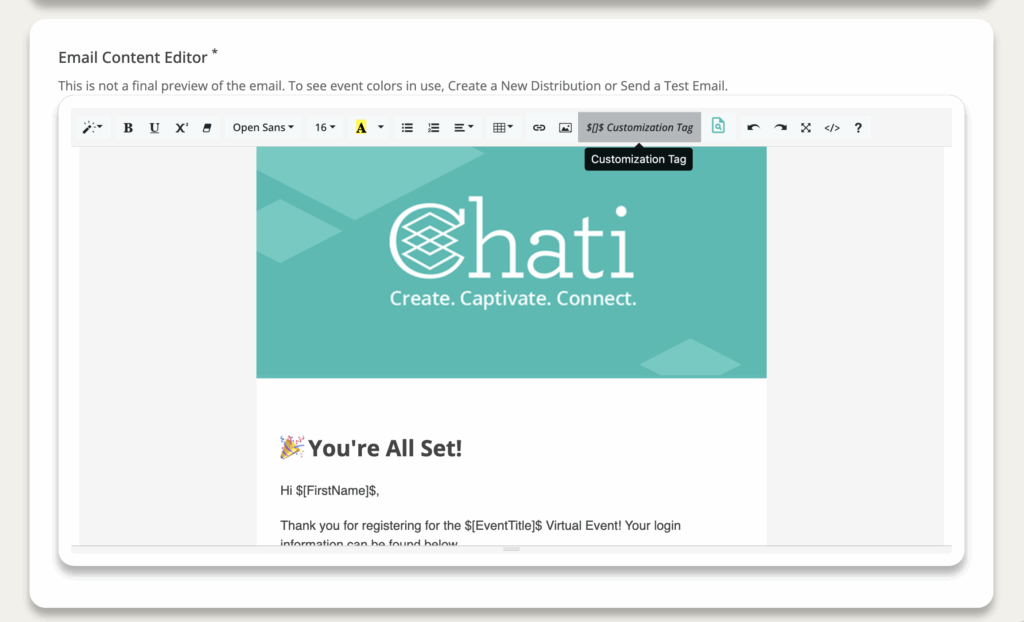
- Email Body: Customize the message content
- Welcome message
- Package-specific access details
- Event date, time, and timezone
- Login instructions or event platform link
- What to expect based on their package
- Contact information for support
- Optionally use customization tags to personalize emails
- Account information
- Event Information
- Event Dates
- Profile Information
- Registration Information
- User Defined Fields
- Platform, Account, or Branding Variables
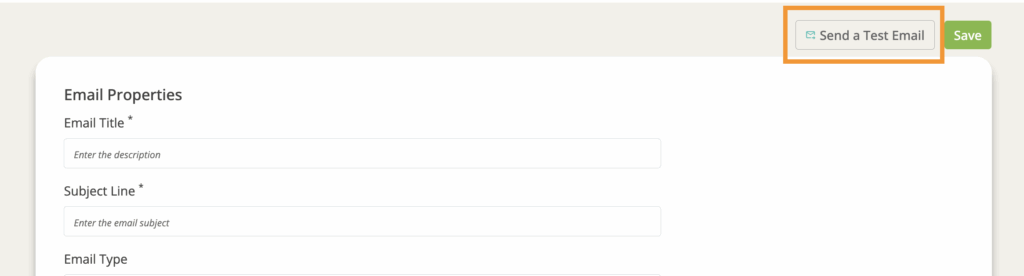
Step 3: Test the Email
- Save your email template
- Send a test email to yourself
- In the email settings, there will be a button to send a test email in the upper right corner
Step 4: Review
- Proofread for spelling and grammar
- Verify all information is accurate
- Ensure links work properly
- Make sure the email is active and can be used (in the email settings)
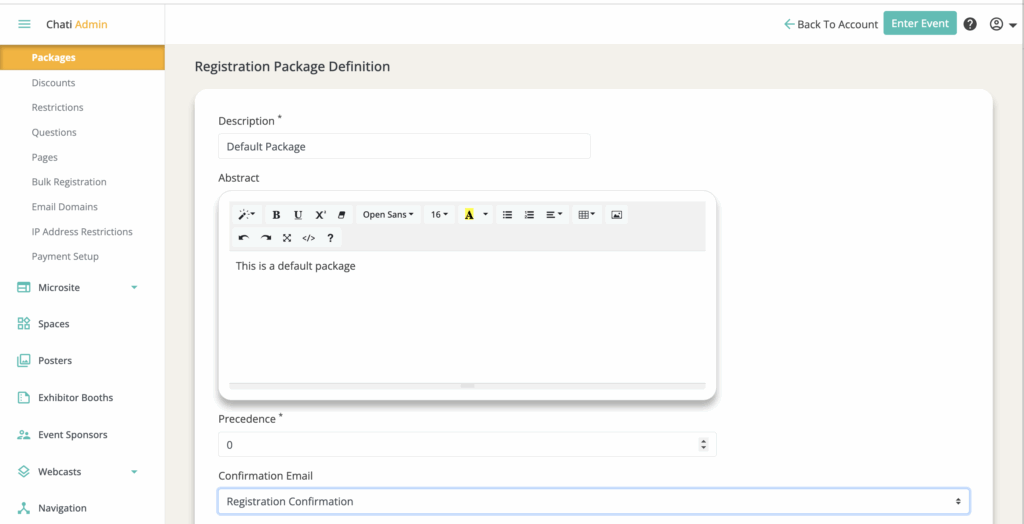
Step 5: Add the Email to a Registration Package
- No distribution is needed in the email settings. Go to the registration package settings, find the confirmation email field, and select the email you created.
- Registration confirmation emails will be automatically sent upon registration.
- If using bulk registration, you will have the option to opt in or out of sending users the confirmation email associated with their package.
Email Content Best Practices
- Keep it concise and actionable
- Highlight the most important information first
- Make it easy to find login/access information
- Include support contact information
- Set clear expectations about what's included
Managing Multiple Package Emails
- Create a template structure you can adapt for each package
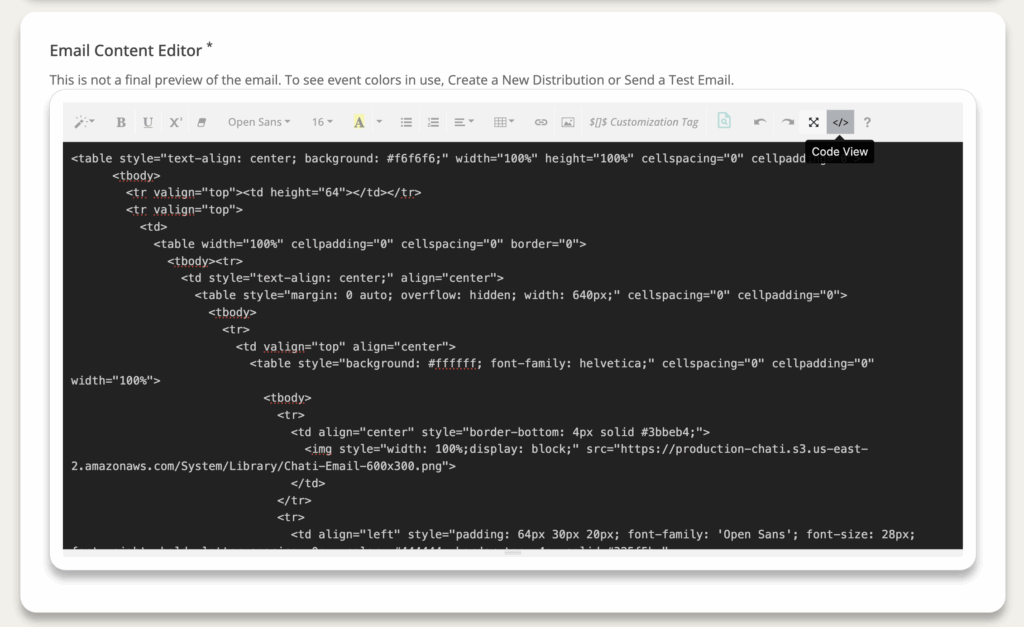
- While emails can’t be copied traditionally, in the Email Content Editor you can click the code view, copy the code, and paste it into a new email.
- Maintain consistent branding across all package emails
- Review all emails before your registration opens