

Overview
Connecting Chati to Salesforce allows your event registration information to pass from Chati to your Salesforce account. The first step is creating a Connected App in Salesforce and sharing its credentials with your Chati support manager.
Note: You may need Salesforce administrator access to complete these steps. If you are not an admin, share this article with the person in your organization who manages your Salesforce instance.
Part 1
Step 1: Create a new external client app
Start inside your Salesforce account:
- Go to the Sales section of your Salesforce org.
- Click the gear/settings icon in the top navigation bar.
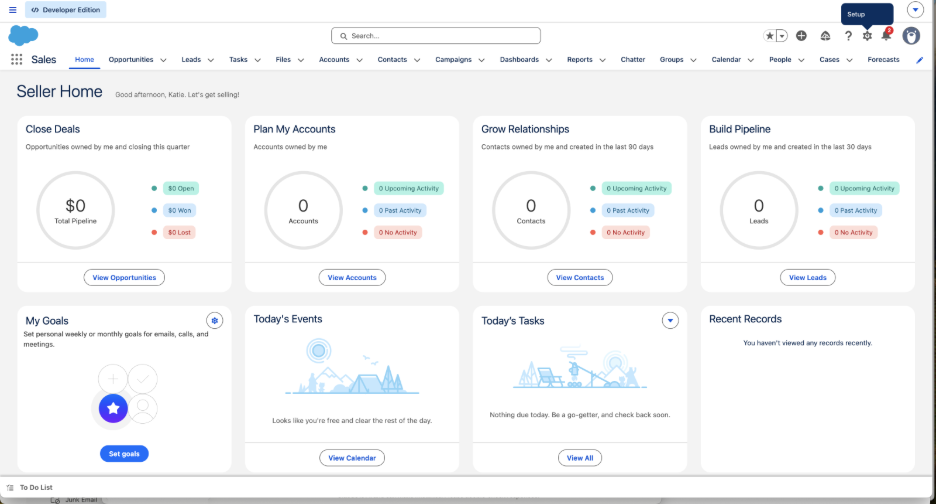
- Search for "App Manager" in the search box that appears.
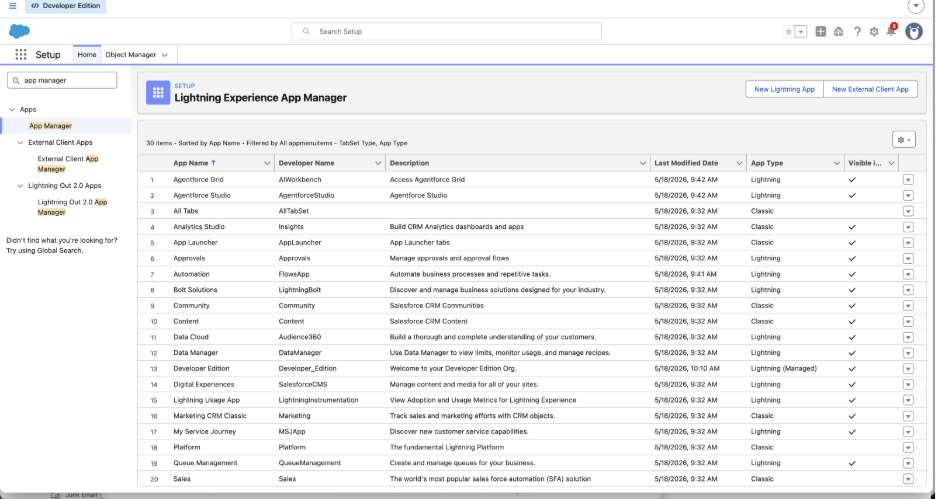
- Click App Manager in the search results.
- Click "New External Client App" in the top right corner.
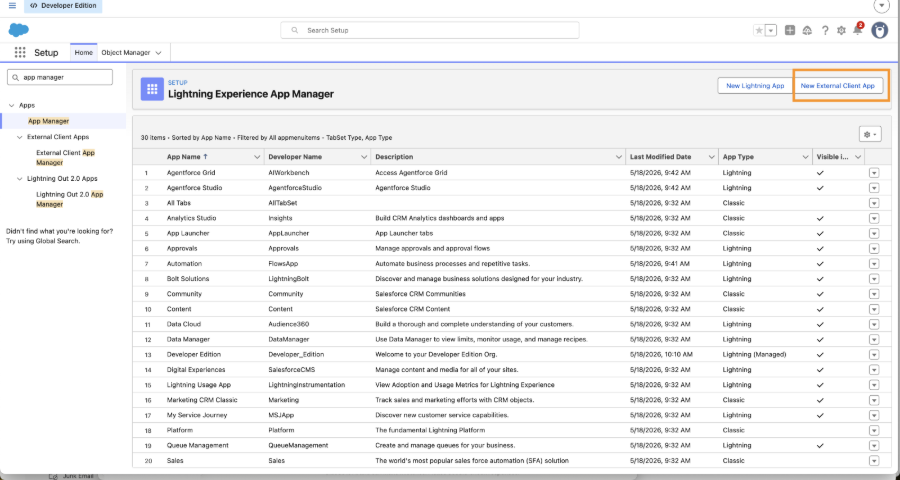
Step 2: Configure the app details
Fill in the following fields on the new app form:
| Field | What to enter |
| External Client App Name | Chati |
| API Name | Chati |
| Contact Email | Your organization's contact email address |
| Distribution State | Select "Local" |
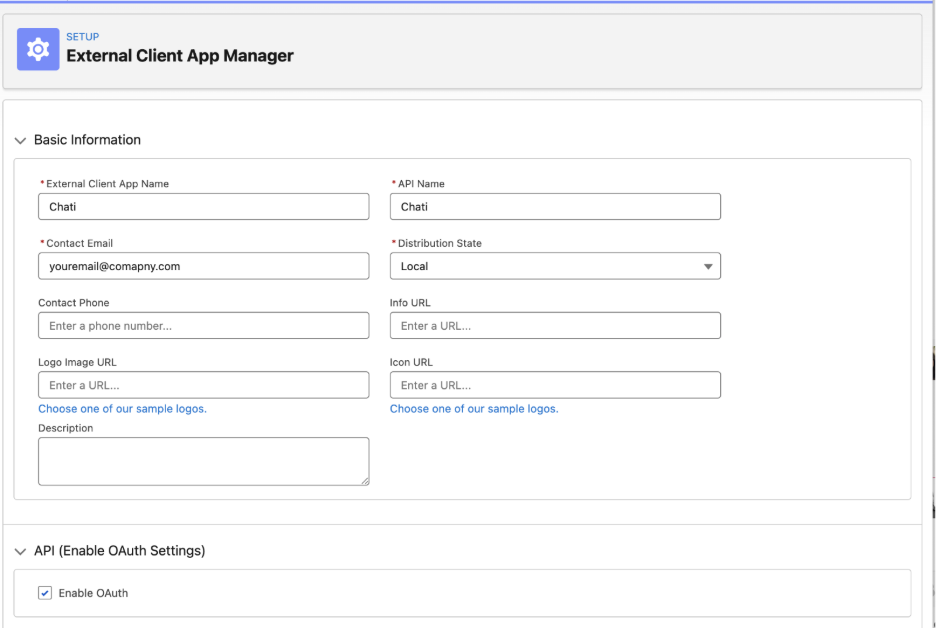
Step 3: Configure OAuth settings
Scroll down to the OAuth Settings section. Enable OAuth using the toggle, then configure the following:
Callback URL
Paste the URL provided by your Chati support manager into the Callback URL field.
OAuth scopes
Add the following two scopes:
- Manage user data via APIs (api)
- Perform requests at any time (refresh_token, offline_access)
Flow enablement
Leave all Flow enablement fields unselected.
Security settings
Under Security, enable both of the following:
- Require secret for Web Server Flow
- Require secret for Refresh Token Flow
Step 4: Save and retrieve your credentials
- Click Save to create the app.
- After saving, scroll to the OAuth section under the Settings tab. You will see a button labeled Customer Key and Secret. Click it.
- Verify your identity if prompted — Salesforce may send a code to your email.
- Copy your Customer Key and Customer Secret Key. These are the credentials Chati needs to complete the integration.
- Share both keys with your Chati support manager via your agreed secure channel.

Note: Do not share your Customer Key or Customer Secret Key publicly or over unencrypted channels. Treat these like a password.
What happens next
Once your Chati support manager receives your credentials, they will configure access on the Chati side. You will be notified when you can proceed with part 2.
If you have any questions during this process, contact your Chati support manager directly.
Part 2: Event Configuration
After your Chati support manager has configured your access, you are ready to officially connect your account to Salesforce.
Step 1: Connect Your Chati Account to Salesforce
In your Chati Admin portal at the Account level go to Integrations--> Salesforce. Click “Get Started”.
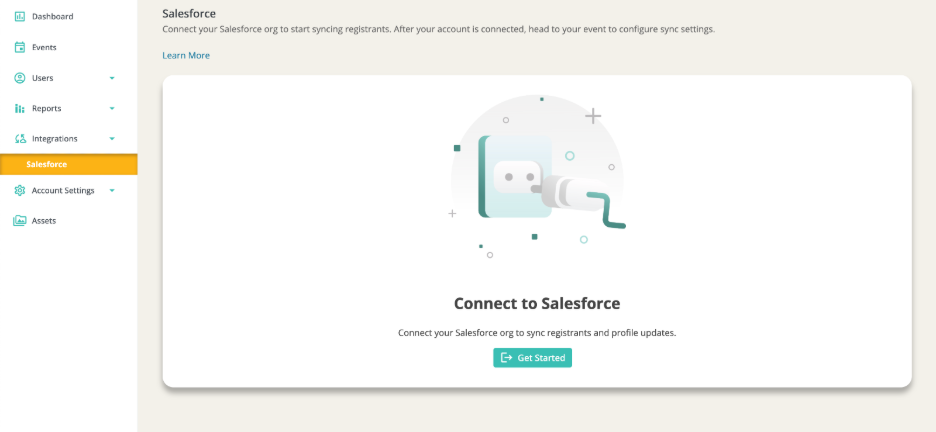
You will be prompted to log into your Salesforce account using a secure OAuth process and may be sent an email from Salesforce with a verification code.
Once connected to your account, you are ready to connect your event registration to Salesforce.
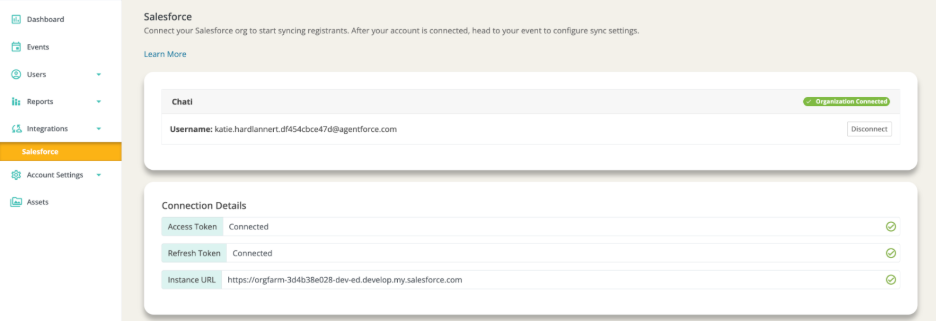
Step 2: Build Your Event Configuration
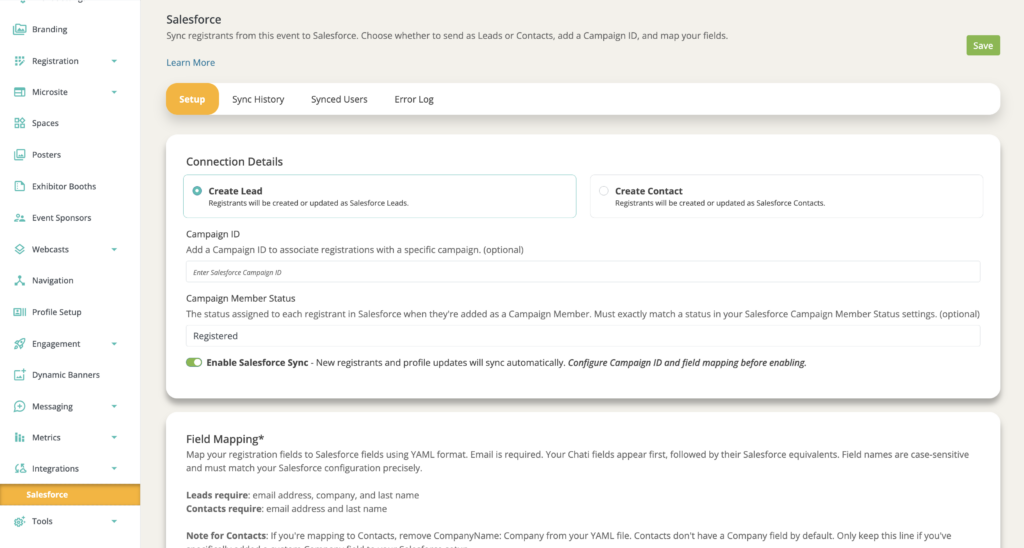
Choose Your Sync Type
Head to your event's Integrations > Salesforce page. You'll see two options:
Create Lead: Registrants are synced as Salesforce Leads
- Requires: Email, Last Name, Company
Create Contact: Registrants are synced as Salesforce Contacts
- Requires: Email, Last Name
- Note: Contacts don't have a Company field by default. Only include the company mapping if you've added a custom Company field to Salesforce.
Important: Don’t change this selection after you enable sync, choose carefully.
Add Campaign ID (Optional)
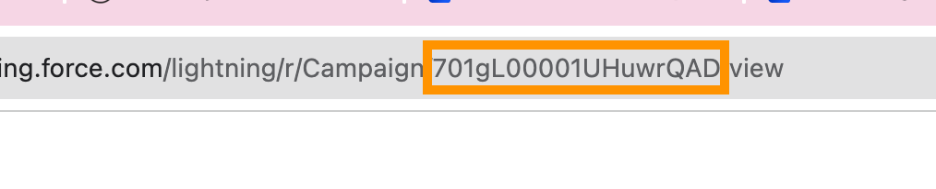
If you want registrants added to a Salesforce campaign, find your campaign's ID:
- Open your campaign in Salesforce
- Look at the URL—the ID is the 18-character code at the end
- Paste it into the Campaign ID field
You can also set a Campaign Member Status (e.g., "Registered”). This status will be assigned to each registrant when they're added as a campaign member.
Heads up: If you change the Campaign ID after syncs have already run, we'll show you a warning. Previously synced records can't be moved to a new campaign.
Map Your Fields
Map your Chati registration fields to Salesforce fields using a simple Chati field: Salesforce field format.
Standard profile fields, affiliate data, registration package, registration date, user type, user defined fields, and custom registration questions can all be sent to Salesforce. In Salesforce, ensure that you have fields created or available for each piece of information you want to send.
If you need to create new fields in Salesforce, use these field types based on your Chati field:
| Chati Field | Salesforce Field |
| Text field | Text |
| Radio Buttons Dropdown | Picklist Picklist |
| Multiselect | Picklist (multi-select) |
| UDF (Entry Field) | Text, Text Area, or Text Area (Long) |
| Registration Date | Date/Time |
Note: Comment entry mode questions are not supported for sync. Full name is not a supported field type.
Important for Picklists: If you're mapping a Chati dropdown or multiselect to a Salesforce picklist, ensure the list options match exactly. For example, if your Chati dropdown has "VIP," "Standard," and "Guest," your Salesforce picklist must have those exact same options (same spelling, same case).
Tips for Successful Mapping
- Email, Last Name (and Company for Leads) are required.
- Use Salesforce API field names, not labels. For example: Registration_Package__c not "Registration Package"
- Custom Salesforce fields need the __c suffix (e.g., Custom_Field__c)
- Field names are case-sensitive — they must match Salesforce exactly
Country Field Mapping
If you're mapping country data, your account can use Salesforce's default country list. This ensures your Chati country values match Salesforce's standard list automatically.
If you use a custom country list: Go to Account Settings > Country Lists and either select the system Salesforce country list, or copy it and make your own modifications. Then use your custom list values in your field mapping.
Example: Lead Mapping
FirstName: first_name
LastName: last_name
Email: email
Company: company
JobTitle: job_title
RegistrationDate: registration_date__c
Country: country
Example: Contact Mapping (No Company)
FirstName: first_name
LastName: last_name
Email: email
JobTitle: job_title
Country: country
Note for campaigns: Only contact info and status sync to campaigns. Custom fields and registration dates are stored in the Lead/Contact record but not pushed to the campaign (future enhancement).
Step 3: Enable Sync
When you save your configuration, you'll see a one-time offer:
"Do you want to sync your 847 existing registrations now?"
- Sync now: All existing registrations are pushed to Salesforce immediately
- Don't sync now: Only new registrations will sync going forward
Choose wisely. You can't sync existing registrations later if you skip this step.
How Sync Works
Every 4 hours, we check for new registrations and profile updates. We match by email address and automatically create or update the Lead/Contact in Salesforce.
Track Your Syncs
Go to Sync Logs on your event's Salesforce page to see:
- When syncs ran
- Successful records
- Errors logs
GDPR & Data Deletion
If a registrant requests to be forgotten under GDPR, Chati will automatically send the updated information to Salesforce during the next scheduled sync. The registrant's Salesforce record will be updated according to reflect Chat’s data replacement process (see below for an example of a GDPR forgotten record updated in Salesforce). Please follow your company GDPR process when utilizing this integration.

Common Issues
"Email is required" error Make sure your Chati email field is mapped in YAML.
Sync stopped Check your Campaign ID hasn't changed, your account connection is active, and field mappings still match Salesforce. Sync resumes automatically on the next batch cycle.